📱 Access Control Mobile App Guide
Complete Setup & User Guide
Get your device ready and master the app in minutes!
📑 Table of Contents
Part 1: Device Setup (Do This First!)
- 🚀 Quick Start Checklist
- ⏱️ Step 1: Screen Timeout
- 🔊 Step 2: Sound & Volume Settings
- 🌐 Step 3: Internet Connection
- 📷 Step 4: App Permissions
- 🌍 Step 5: Timezone Settings
Part 2: User Guide (How to Use the App)
- 🎯 Getting Started
- 🔐 Login Process
- 🏢 Space Selection
- 🏠 Home Screen Overview
- 📸 Scanning Badges
- 🔄 Understanding Sync Status
- 📊 Viewing Statistics
- 📤 Exporting Data
- ⚙️ Switching Spaces
- ❓ Troubleshooting
Part 1: Device Setup
🚀 Quick Start Checklist
⚠️ IMPORTANT: Complete these 6 steps BEFORE using the app!
✅ Essential Setup (5 minutes)
- ⏱️ Screen Timeout → Set to maximum (30 min or Never)
- 🔊 Volume → Turn to maximum + Turn OFF Do Not Disturb
- 🌐 Internet → Test with YouTube + Browser
- 📷 Camera → Grant permission when app asks
- 🌍 Timezone → Set to the event country's timezone
- ✅ Test App → Login and try scanning
👉 Scroll down for detailed instructions on each step.
📋 What You'll Need
| Item | Requirement |
|---|---|
| 📱 Device | Zebra TC 26, TC 27 |
| 🌐 Internet | Wi-Fi or Mobile Data connection |
| 📷 Camera | Required for scanning QR codes |
| 🔑 Credentials | Username and password |
| 📊 Excel/Sheets | Google Sheets to view reports |
| 📧 Gmail | Gmail account to send reports to organizer |
⏱️ Step 1: Screen Timeout
🎯 Why: Prevents your screen from locking while scanning badges.
📱 Android Devices
Simple Steps:
- Open Settings on your device
- Tap Display (or Screen)
- Tap Screen timeout (or Sleep)
- Choose 30 minutes or Never (if available)
📍 Can't find it?
| Device Type | Path |
|---|---|
| Zebra TC26, TC27 | Settings → Display → Screen timeout |
💡 Pro Tip: If you see "Keep screen on" option, turn it ON!
🔊 Step 2: Sound & Volume Settings
🎯 Why: You need to hear confirmation sounds when badges are scanned successfully.
📱 Quick Setup (All Devices)
Step 1: Turn Volume to Maximum
- Press the Volume Up button until it reaches maximum
- Or go to: Settings → Sound → Volume → Set to maximum
Step 2: Turn OFF Do Not Disturb
- Swipe down from top → Look for "Do Not Disturb" icon → Tap to turn OFF
- Or: Settings → Sound → Do Not Disturb → Turn OFF
Step 3: Turn OFF Silent Mode
- Make sure your device is NOT in silent/vibration-only mode
- Check the volume buttons
🌐 Step 3: Internet Connection
🎯 Why: The app needs internet to login, scan badges, and sync data.
✅ Quick Internet Test (2 Minutes)
Test 1: YouTube Test
- Open YouTube app
- Play any video
- ✅ If video plays smoothly → Internet is working!
Test 2: Browser Test
- Open Chrome browser
- Visit:
www.google.com - ✅ If page loads → Internet is working!
Test 3: Backend Server Test (Optional but recommended)
- In browser, visit:
https://registration.xporience.com - ✅ If page loads → Server is accessible!
📶 Connection Status Guide
| Connection Type | What to Check |
|---|---|
| Wi-Fi | ✅ Connected to Wi-Fi (check top of screen) ✅ Signal shows 2-3 bars minimum ✅ Move closer to router if weak |
| Mobile Data | ✅ Mobile Data is ON (check settings) ✅ Signal shows 2-3 bars minimum ✅ Check you have data plan available |
⚠️ Important Notes
| Internet Status | What Happens |
|---|---|
| ✅ Good internet | Smooth scanning and instant sync |
| ⚠️ Poor internet | App saves badges offline, syncs later |
| ❌ No internet | Can't login, but can scan and save offline |
💡 Tip: Test internet BEFORE the event starts!
📷 Step 4: App Permissions
🎯 Why: The app needs permission to use your camera and save files.
📷 Camera Permission (REQUIRED)
When: App will ask when you first open the scanner screen.
What to do:
- Open the app
- Go to Scanner screen
- App will ask: "Allow camera access?"
- Tap Allow or OK
If you accidentally denied it:
- Settings → Apps → Access Control App → Permissions → Camera → Allow
💾 Storage Permission (Android Only - For Exports)
When: App will ask when you try to export data to Excel/CSV.
What to do:
- When app asks for storage permission
- Tap Allow
If you need to grant it manually:
- Settings → Apps → Access Control App → Permissions → Storage → Allow
✅ Other Permissions (Automatic)
These are granted automatically - no action needed:
- ✅ Internet Permission (for API calls)
- ✅ Vibration Permission (for haptic feedback)
🌍 Step 5: Timezone Settings
🎯 Why: Scan times, "Today's Scans," and reports depend on the correct timezone. Wrong timezone = wrong dates and counts.
⚠️ Do This BEFORE the Event
Set the timezone for the country where the event is held — before the event starts.
| Event Country Example | Set Timezone To (examples) |
|---|---|
| India | Asia/Kolkata (IST, UTC+5:30) |
| UAE / Dubai | Asia/Dubai (GST, UTC+4) |
| UK | Europe/London (GMT/BST) |
| USA (East Coast) | America/New_York (EST/EDT) |
| Singapore | Asia/Singapore (SGT, UTC+8) |
Ask your event organizer if you are unsure which timezone to use.
📱 Set Device Timezone
Android
- Open Settings
- Tap System → Date & time (or General management → Date and time)
- Turn OFF "Automatic date & time" / "Use network-provided time" if needed
- Tap Time zone (or Set time zone)
- Select the event country's region / city
- Confirm the clock shows the correct local time for that country
iOS
- Open Settings
- Tap General → Date & Time
- Turn OFF "Set Automatically" if you need a specific zone
- Tap Time Zone
- Search and select the event country's city
- Confirm the clock shows the correct local time for that country
🧑💼 Account / Event Timezone (Admin)
The app also uses the timezone returned at login for visit timestamps. Before the event:
- Confirm with your admin that the user/event timezone is set for the same country as the venue
- If the event moves to another country, the timezone must be updated again before scanning starts
- Do not start scanning until both device and account timezones match the event country
✅ Verification Test
- Check the device clock against local time at the venue
- Login to the app and confirm the date on the Home Screen looks correct
- ✅ Success! You're ready for the next step.
Part 2: User Guide
🎯 Getting Started
Welcome to the Access Control Mobile App!
This app helps you scan and manage visitor badges at events. Follow this guide to learn how to use all features effectively.
🧭 Quick Flow Overview
Follow these six checkpoints and tap the section links if you need more detail:
- Launch & Splash → wait for the purple Access Control splash screen to finish loading.
- Login → enter username + password, tap LOGIN.
- Select Space → search or tap the correct gate, confirm if prompted.
- Dashboard → verify Online status, check stats, sync if needed.
- Scan → tap the floating QR button, keep scanning (even offline).
- Export/Report → Tap the email icon (envelope) in the top-right corner to send reports to the organizer.
🖼️ Visual Walkthrough
Use these annotated screenshots to get familiar with each major screen before you head onsite. All images live in docs-site/public/assets/images.
Splash Screen
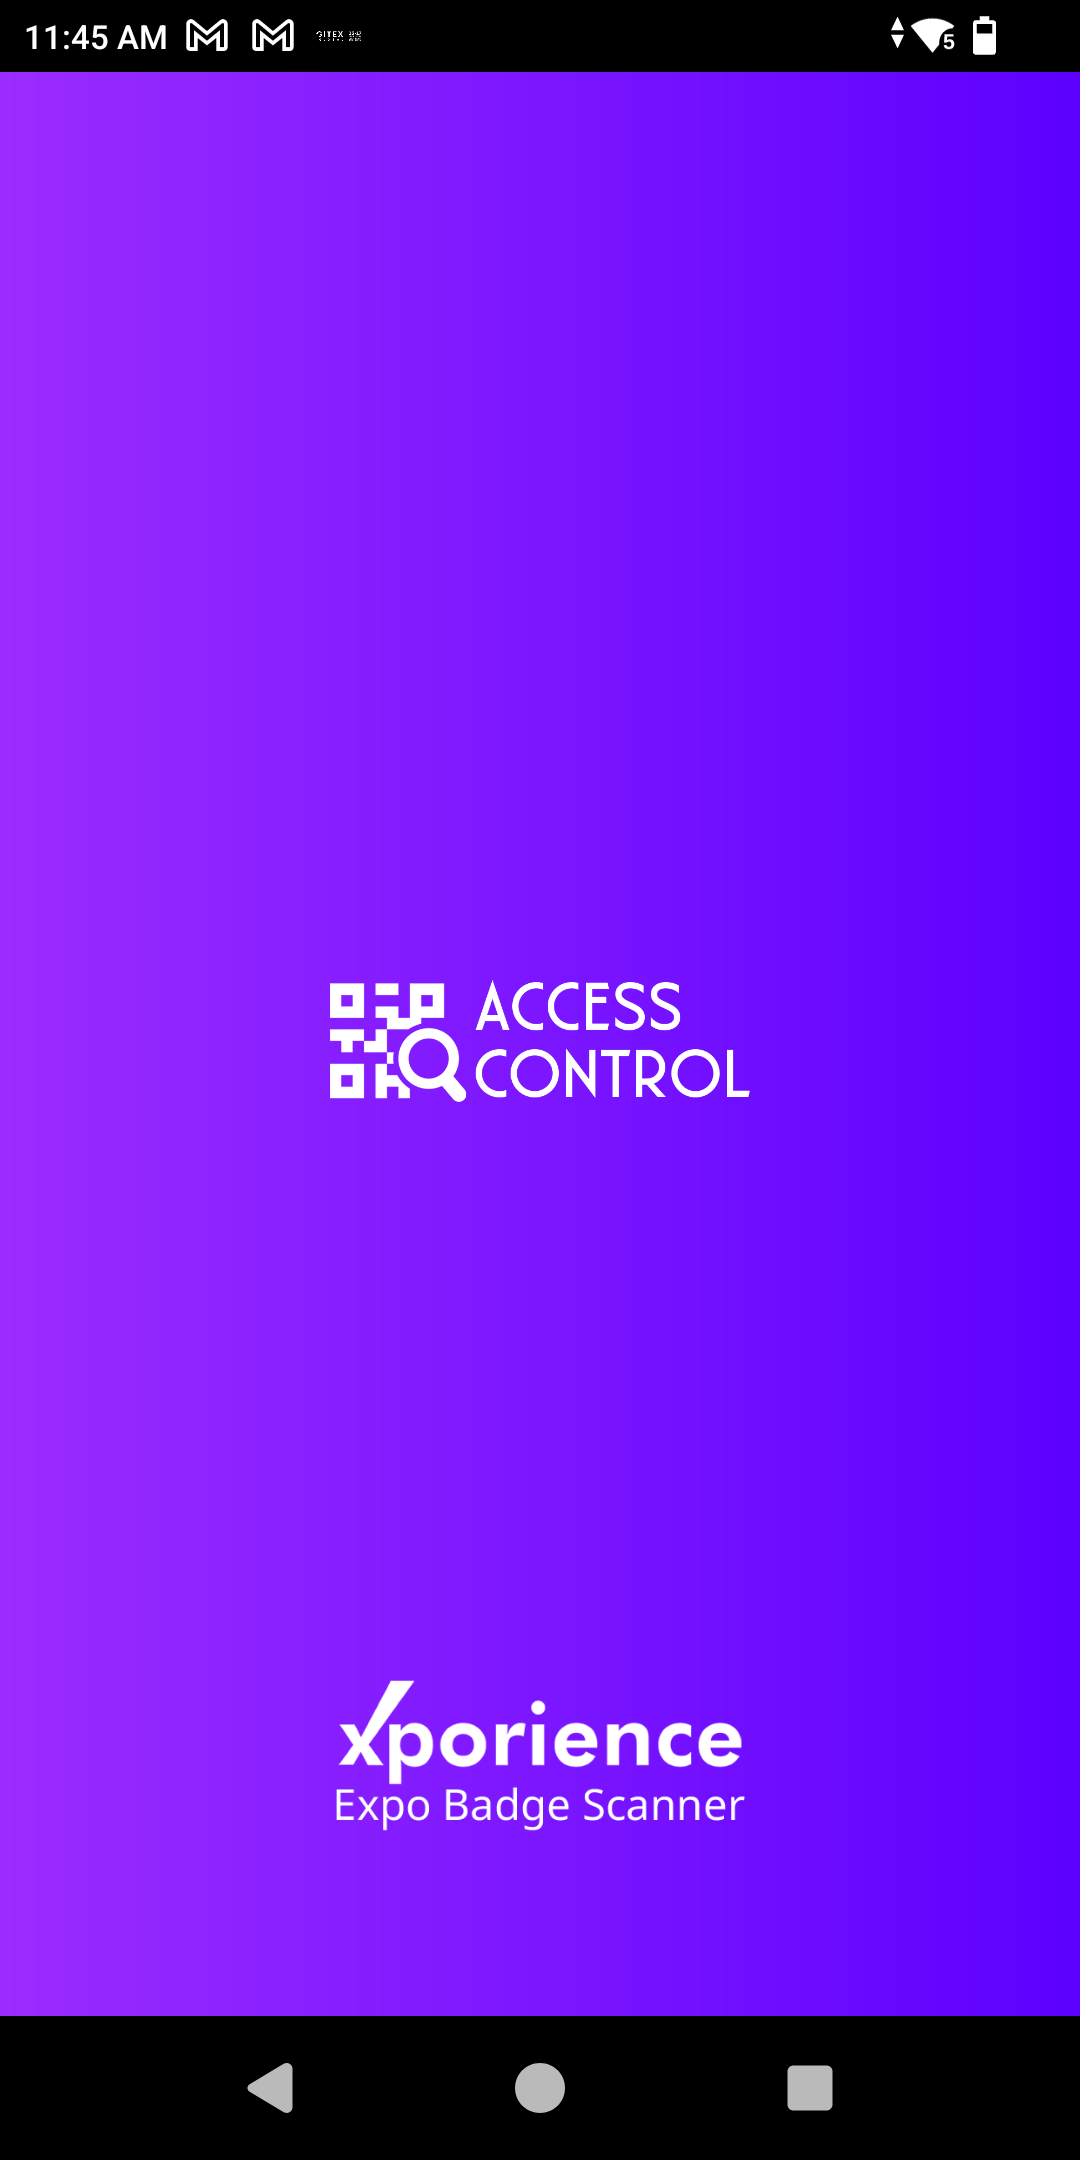
App boot screen – indicates the bundle is loading.
- Shows the branded purple gradient background and Access Control logo while the app initializes.
- Confirms that the Access control bundle is loading correctly before navigation is available.
Login Screen
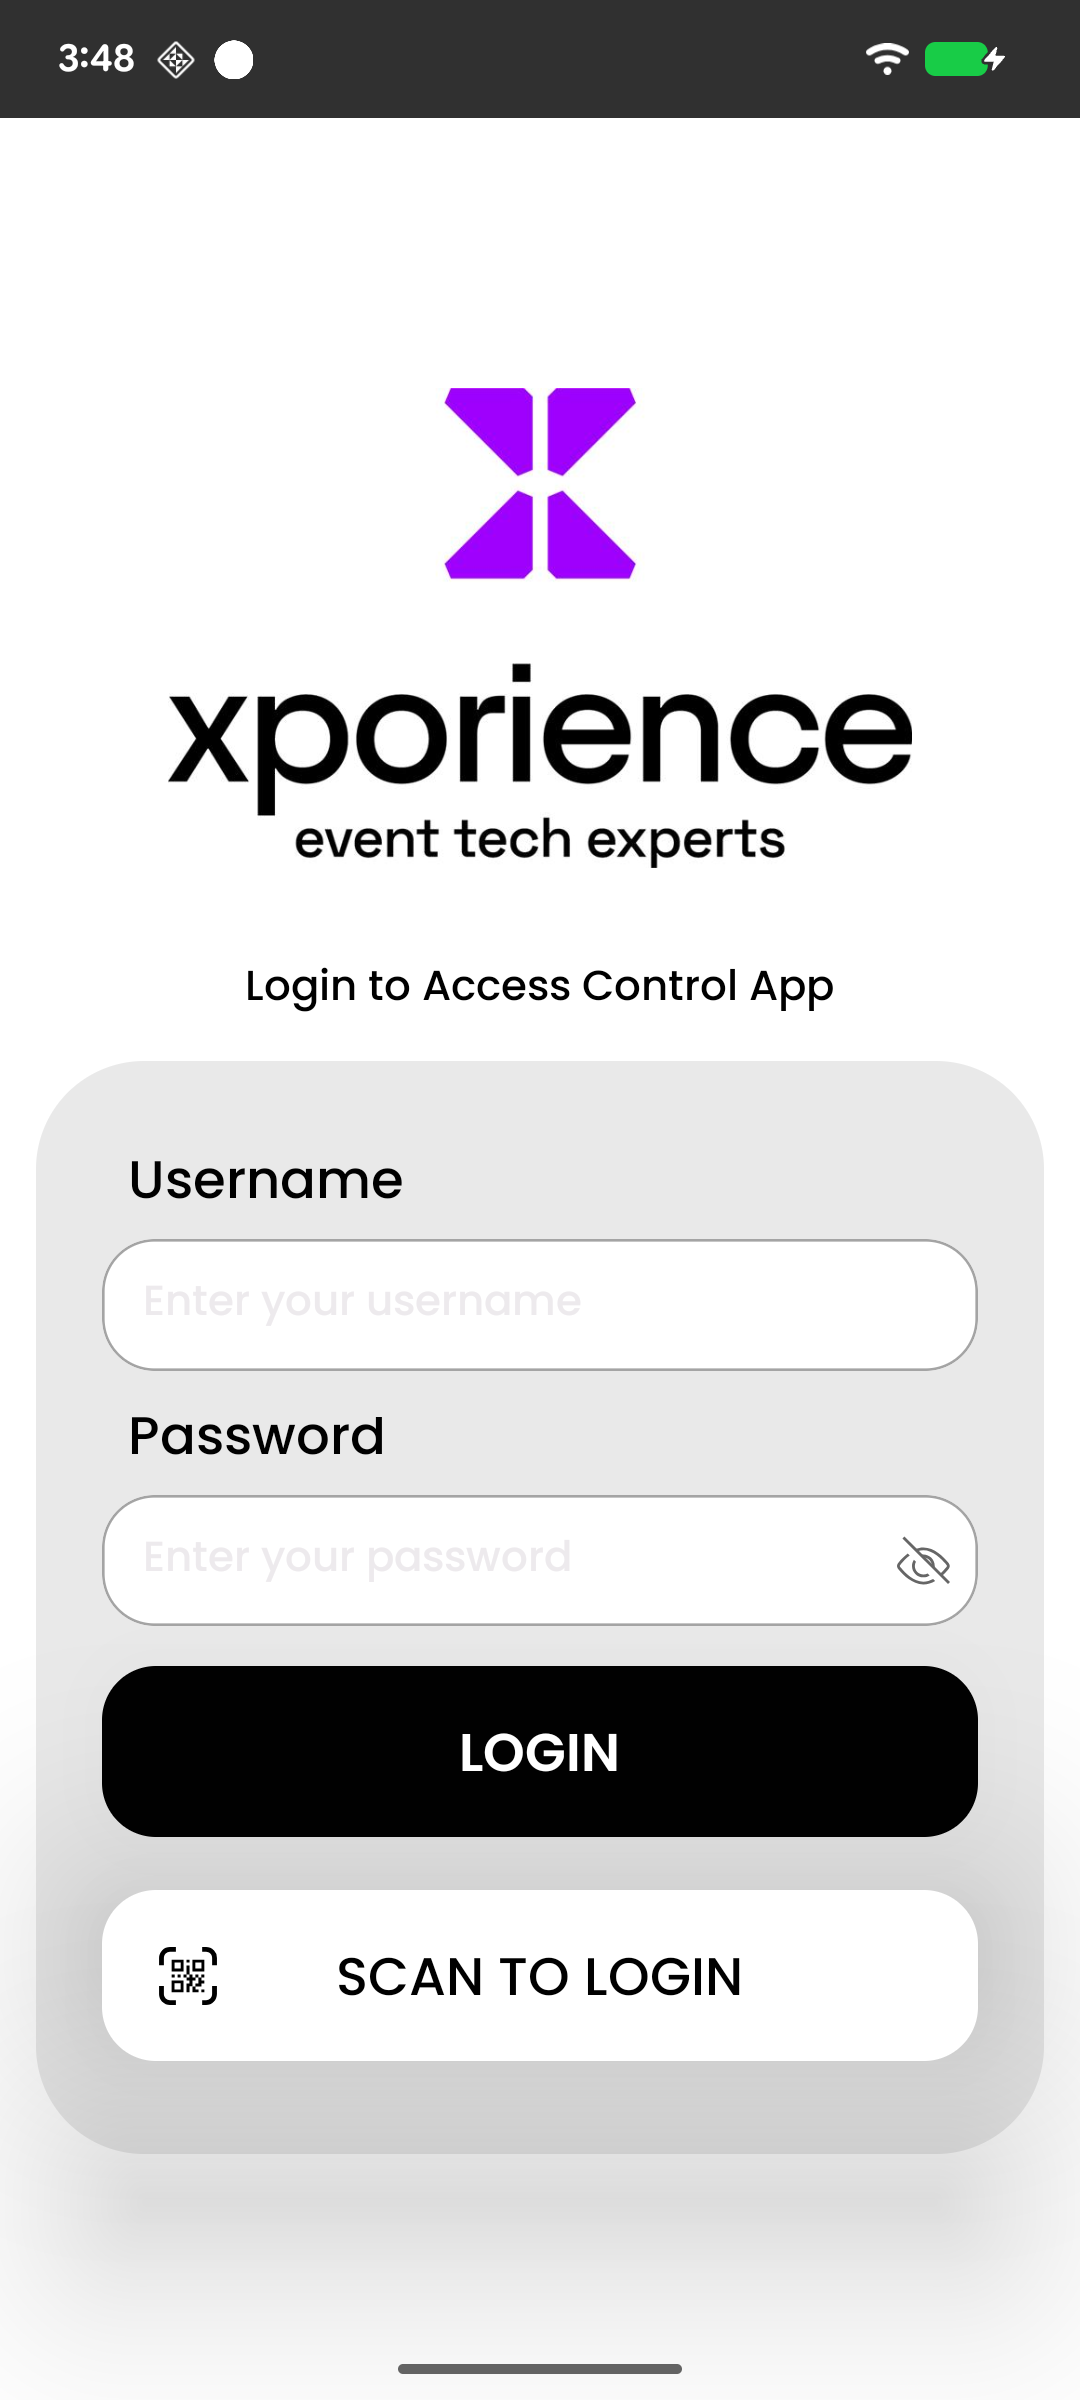
Enter credentials manually or scan QR code to login quickly.
- Clean, minimal layout with rounded inputs for Username and Password.
- Password field includes a visibility toggle, and the primary LOGIN button stays disabled until both fields contain text.
- SCAN QR TO LOGIN button allows you to quickly scan a QR code containing your credentials instead of typing them manually.
- Reminder text “Login to Access Control App” matches the setup instructions in the guide.
Space Selection Screen
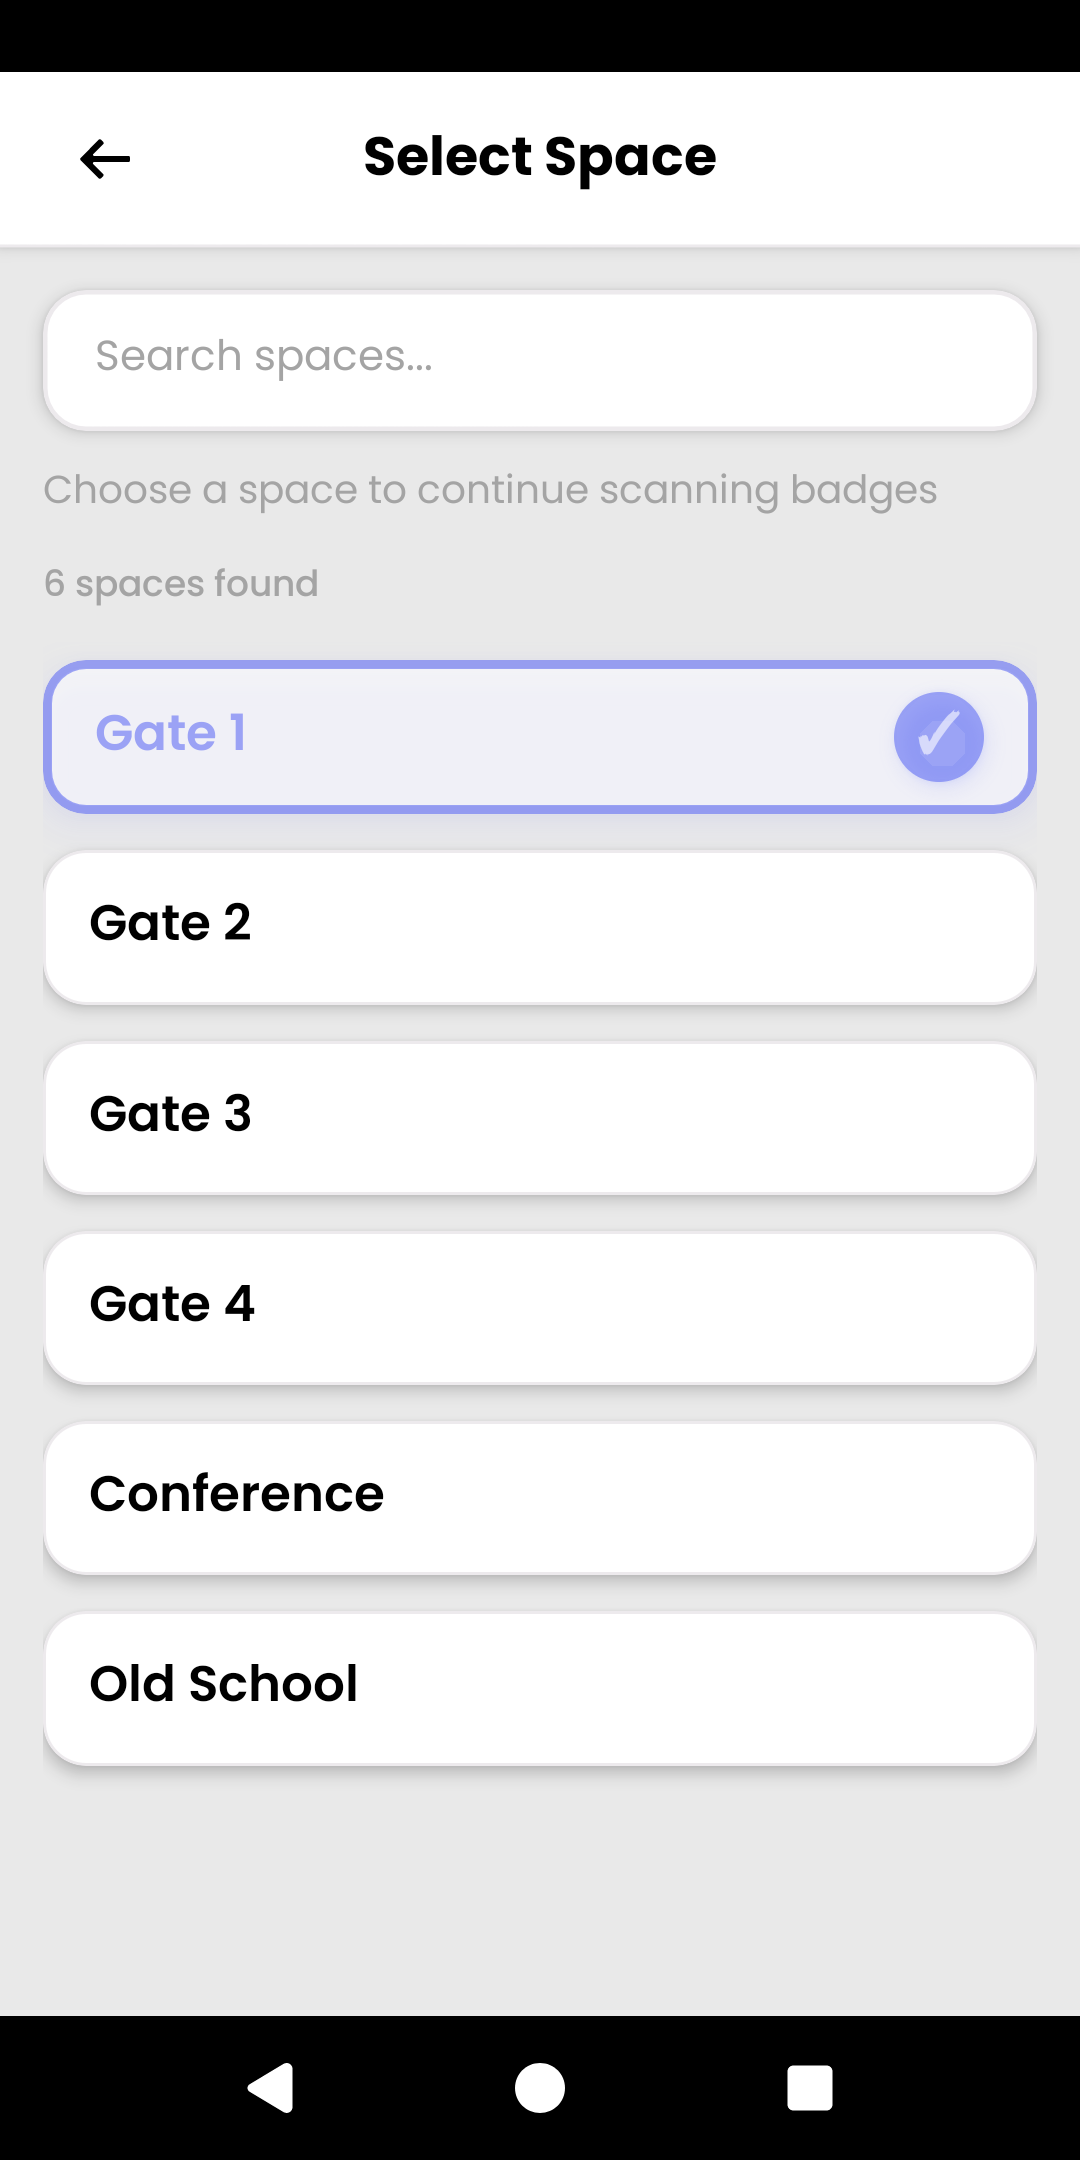
Search or tap the correct gate, then continue to the dashboard.
- Appears immediately after a successful login.
- Search bar filters long space lists instantly; each card displays the space name with a soft shadow.
- Selected space highlights with a purple border and check mark so operators can confirm before the scanning.
Password Prompt Modal
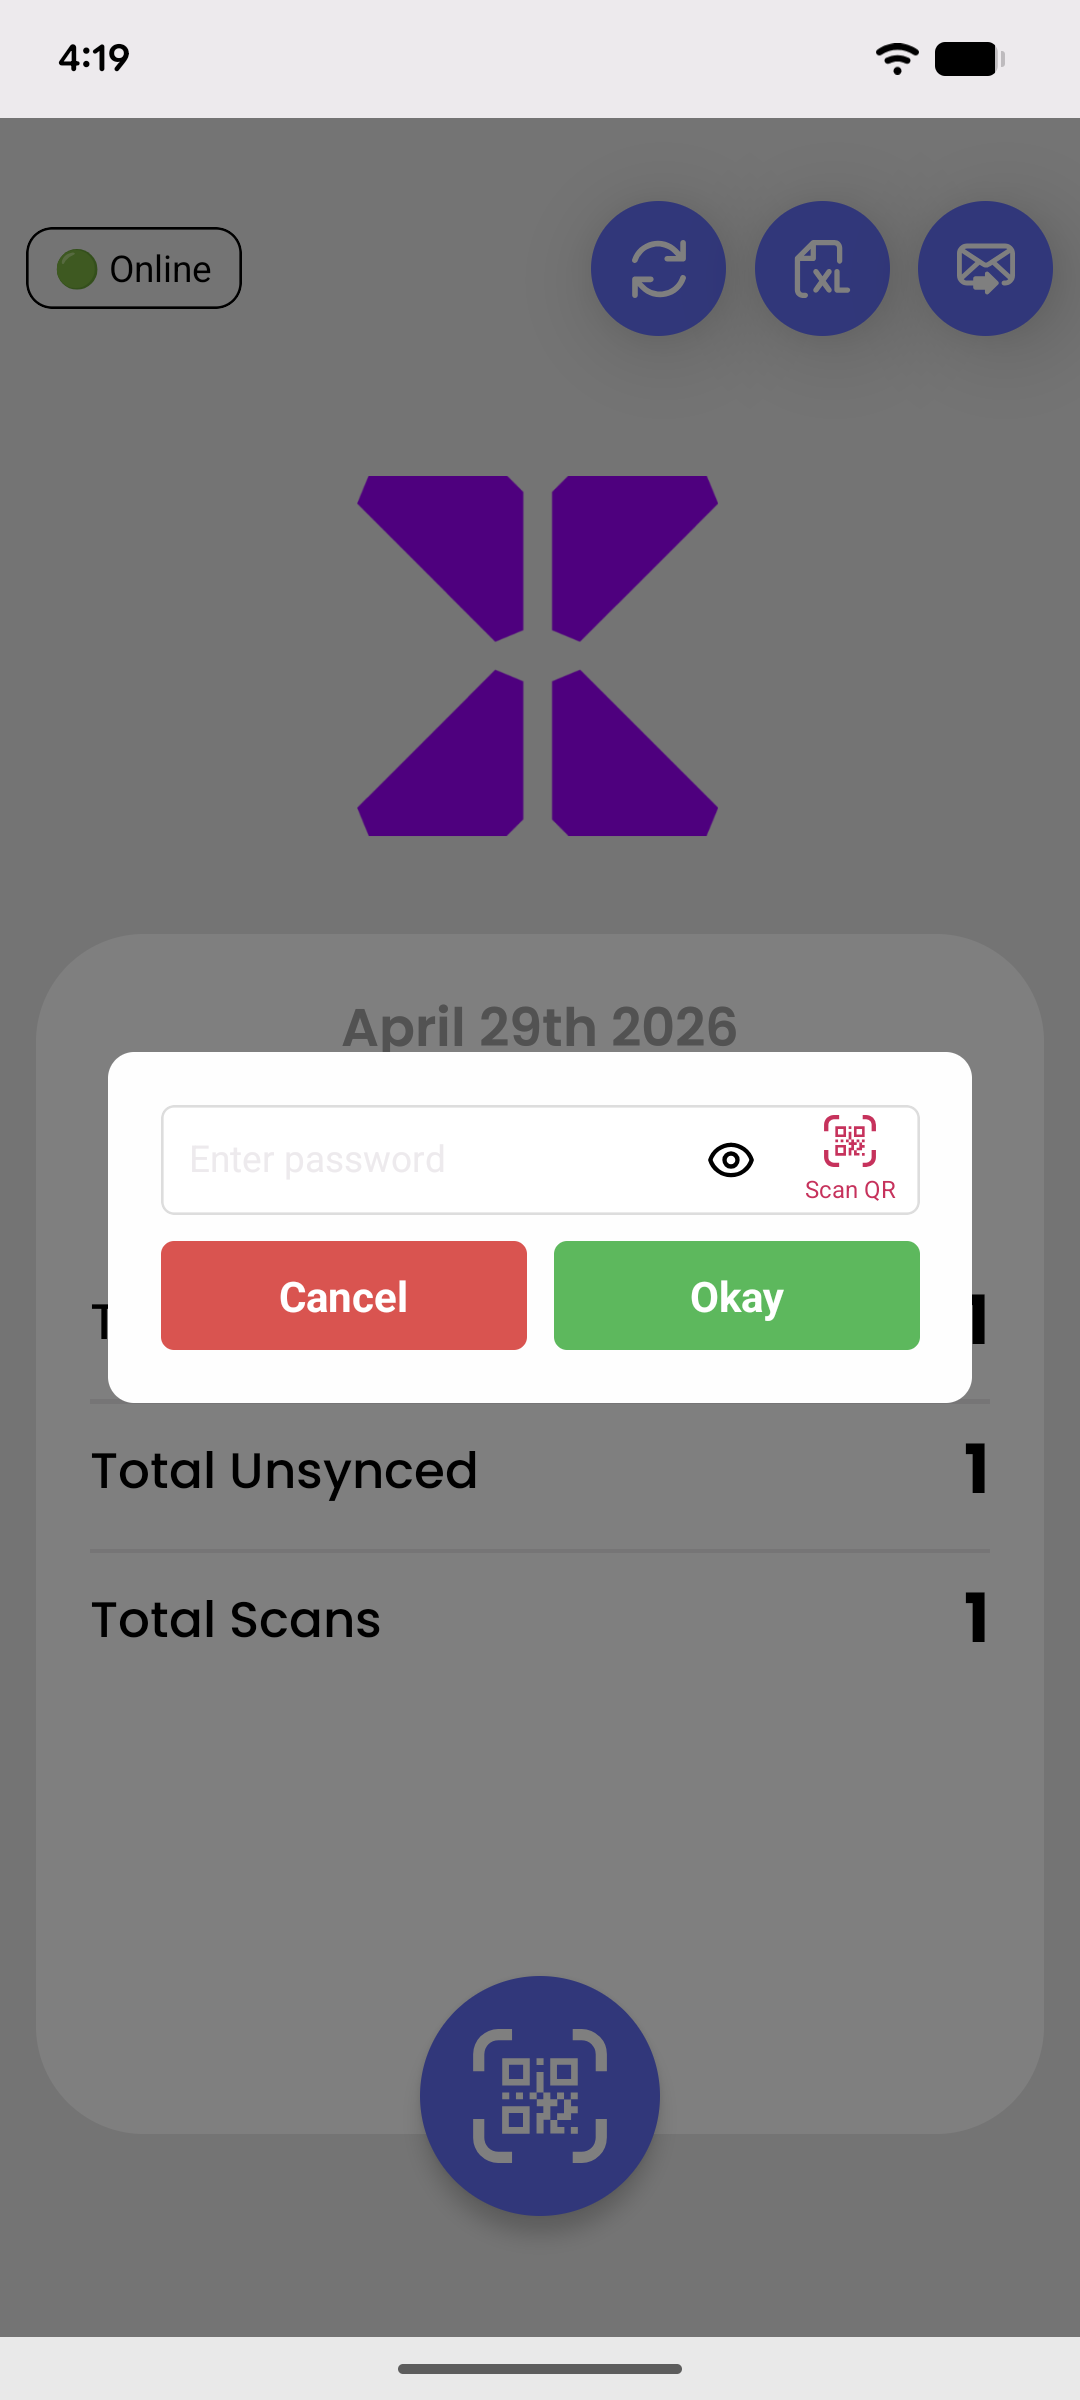
Shown when switching spaces or exporting—you’ll need the shared password.
- When exporting, switching spaces, or accessing restricted tools, the app shows this centered modal.
- Eye icon toggles password visibility; Scan QR icon allows you to quickly scan a QR code to fill the password field.
- Cancel (red) backs out, Okay (green) confirms.
Home Dashboard
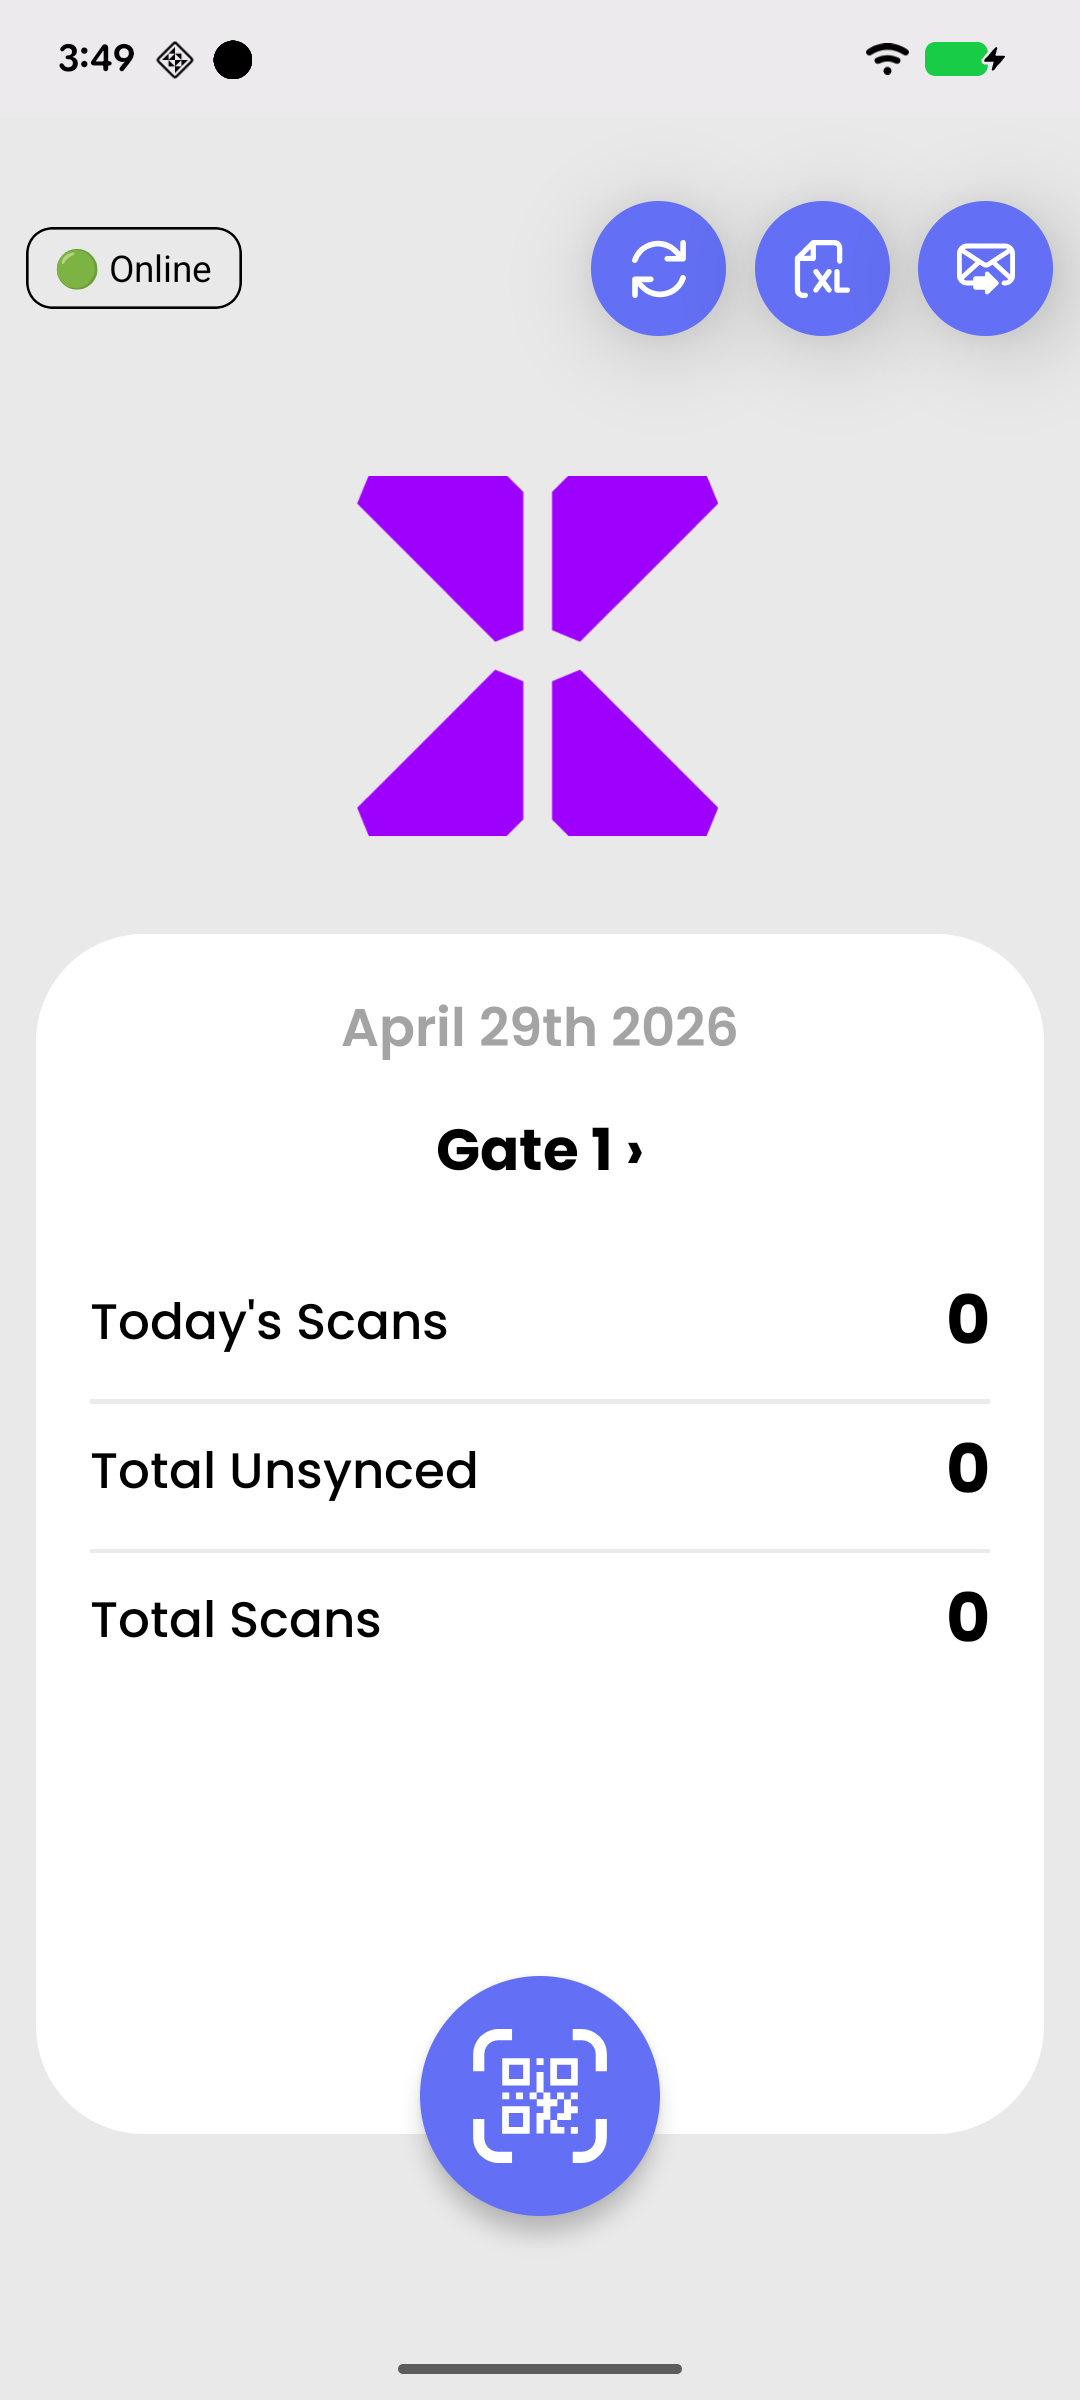
Live status, stats, sync/export/email actions, and the big scan button.
- Displays online/offline badge in the top-left, real-time sync/export/email icons on the right, and live statistics (Today’s Scans, Total Unsynced, Total Scans).
- The floating scan button opens the QR scanner; tapping the space name or arrow lets you switch spaces.
- Bottom sheet shows the current date and selected space, mirroring the behavior described in the “Home Screen Overview” section.
🔐 Login Process
Step-by-Step Login
-
Open the App
- Launch the Access Control Mobile App
- You'll see the login screen
-
Enter Credentials
Option A: Manual Entry
- Username: Enter your username (no spaces allowed)
- Password: Enter your password
- Tap the eye icon to show/hide password
Option B: QR Scan (Quick Login)
- Tap "SCAN QR TO LOGIN" button
- Scan a QR code containing your credentials in format:
{"username":"your@email.com","password":"yourpassword"}orusername:password - App will automatically fill credentials and proceed with login
-
Tap LOGIN Button (or wait for auto-login after QR scan)
- Wait for authentication (spinner will show)
- On success, you'll be taken to Space Selection screen
⚠️ Login Troubleshooting
| Problem | Solution |
|---|---|
| "Credentials can not be left blank" | Make sure both username and password are entered |
| "You're offline. Please connect to the internet" | Check internet connection and try again |
| "Invalid Credentials" | Verify credentials are correct |
🏢 Space Selection
A Space is a specific area or location at the event where you'll be scanning badges. You must select a space before you can start scanning.
Selecting Your Space
-
After Login
- You'll see a list of available spaces
-
Search for Space (if many spaces)
- Use the search bar at the top
- Type space name to filter
-
Select Your Space
- Tap on the space you want to work in
- Wait for confirmation
-
Success!
- You'll be taken to the Home Screen
- Your selected space name appears on Homescreen.
Understanding Space Types
| Space Type | Behavior |
|---|---|
| Visitor (Type 1) | Detects if someone already checked in today Shows "Successful Re-checkin" if scanned again |
| Conference (Type 2) | Always allows checkin No duplicate detection |
🏠 Home Screen Overview
Main Components
The Home Screen is your main dashboard. Here's what you'll see:
Top Section:
- Logo/Header - Event branding
- Sync Icon - Shows sync status (rotating = syncing)
- Export Icon - User can export the data in Excel
- Send Report - User can Send report to the Organiser.
Bottom Section:
- Current Date - Shows today's date
- Space Name - Your selected space (tap to change)
- 📊 Today's Scans - Badges scanned today
- 🔄 Total Unsynced - Badges waiting to sync
- 📈 Total Scans - All-time scan count
- SCAN BADGE Button - Opens camera scanner
Understanding the Sync Icon
| Icon State | Meaning |
|---|---|
| 🔄 Rotating | Sync in progress - wait for it to finish |
| ✅ Static | Sync complete - all badges synced |
💡 Tip: Tap the sync icon to manually trigger sync if needed.
📸 Scanning Badges
Two Ways to Scan
The app supports two scanning methods:
- 🔴 Laser Scanner - Uses QR code scanner (recommended)
- 📷 Camera Scanner - Uses device camera
Method 1: Laser Scanner
- Scanner will automatically detect when badge is scanned
- Same feedback sounds and messages apply
Method 2: Camera Scanner
Opening the Scanner
- From Home Screen, tap "SCAN BADGE" button
- Camera will open automatically
- Grant camera permission if asked (first time only)
How to Scan
-
Wait for Scan
- Camera will automatically detect QR code
- You'll hear a success sound ✅ or error sound ❌
- Device will vibrate for feedback
-
Result Messages
- ✅ "Successfully Checked in" - Badge scanned successfully
- ❌ "Invalid Badge" - QR code format is wrong
- 🔄 "Successfully Checked in" (offline) - Saved locally, will sync later
-
Continue Scanning
- Camera stays open for continuous scanning
- No need to tap button again
- Scan multiple badges quickly
Understanding Scan Results
| Result | What It Means | What Happens |
|---|---|---|
| ✅ Successfully Checked in | Badge is valid and approved | Saved to server (if online) or locally (if offline) |
| ⚠️ Successful Re-checkin | Visitor already checked in today (Type 1 spaces) | Still recorded, but marked as re-checkin |
| ❌ Invalid Badge | QR code format is wrong | Not saved - try scanning again |
| 🔒 Restricted Badge | Badge has restrictions | Not saved - badge cannot be used |
| 🌐 Offline Mode | No internet connection | Saved locally, will sync when online |
🔄 Understanding Sync Status
Syncing means uploading scanned badges from your device to the server.
Sync States
| State | Icon | Meaning | Action Needed |
|---|---|---|---|
| Syncing | 🔄 Rotating | Uploading badges to server | Wait for completion |
| Synced | ✅ Static | All badges uploaded | None - ready to scan |
⚠️ Important Notes
- Don't scan during sync - Wait for sync to complete
- Check internet - Sync requires internet connection
- Offline badges are safe - They'll sync when internet returns
📊 Viewing Statistics
Statistics Cards on Home Screen
The Home Screen shows three important statistics:
1. Today's Scans
- Shows count of badges scanned today
- Resets at midnight
- Includes both synced and unsynced badges
2. Total Unsynced
- Shows count of badges waiting to sync
- Should be 0 when fully synced
3. Total Scans
- Shows all-time scan count
- Includes all badges ever scanned
- Never resets
Understanding the Numbers
| Statistic | What It Includes | When It Updates |
|---|---|---|
| Today's Scans | All badges scanned today (synced + unsynced) | Immediately after each scan |
| Total Unsynced | Badges saved offline, not yet uploaded | Updates during sync |
| Total Scans | All badges ever scanned (all time) | Immediately after each scan |
📤 Exporting Data
Exporting Badge Data
You can export all scanned badge data to Excel/CSV files:
How to Export:
- From Home Screen, tap the email icon (envelope icon) in the top-right corner
- Password popup will appear
- Enter password manually or tap "Scan QR" icon to scan a QR code containing the password
- File will be generated and sent via email, or you can access it from your device
What Gets Exported:
- ✅ All scanned badges (synced + unsynced)
- ✅ Badge numbers, dates, times
- ✅ Space information
- ✅ Event details
Export File Format
- Format: CSV
- Naming: Includes date and space name
⚙️ Switching Spaces
When to Switch Spaces
You might need to switch spaces if:
- You're moving to a different area
- You're covering multiple spaces
- You selected the wrong space initially
How to Switch
- From Home Screen, tap the space name at the bottom (or the arrow ›)
- Enter password manually or tap "Scan QR" icon to scan a QR code containing the password
- Select new space from the list
- Wait for sync - App will sync offline badges before switching
- Confirm selection - You'll return to Home Screen with new space
⚠️ Important Notes
- Statistics reset for the new space
- Make sure sync completes before switching
- You can switch back to previous spaces anytime
✅ Complete Setup Checklist
⏱️ Device Settings (5 minutes)
- Screen timeout → Set to maximum (30 min or Never)
- Volume → Turn to maximum
- Do Not Disturb → Turn OFF
- Silent Mode → Turn OFF
- Test sound → Play a notification to verify
🌐 Internet Connection (2 minutes)
- Wi-Fi or Mobile Data → Connected and active
- YouTube test → Video plays smoothly
- Browser test → Google.com loads
- Signal strength → 2-3 bars minimum
📷 App Permissions (1 minute)
- Camera permission → Granted (app will ask)
- Storage permission → Granted (Android only, when exporting)
🌍 Timezone Settings (1 minute)
- Device timezone → Set to the event country's timezone
- Account/event timezone → Confirmed with admin for the same country
- Clock check → Device time matches local venue time
📱 App Testing (2 minutes)
- Login → Successfully logged in
- Space selection → Spaces loaded correctly
- Camera scanner → Opens without errors
- Test scan → Try scanning a QR code (if available)
- Sound feedback → Hear success/error sounds
- Vibration → Feel haptic feedback
🔋 Final Checks
- Battery → Charged or plugged in
- Storage space → At least 1 GB free
- Login credentials → Ready to use
❓ Troubleshooting
🔒 Problem: Screen Keeps Locking
Quick Fix:
- Go back to Step 1 (Screen Timeout)
- Set to maximum time
- Look for "Keep screen on" option
Still locking?
- Some devices have battery saver modes that override settings
- Disable battery optimization for the app
- Keep device plugged in if possible
🔇 Problem: No Sound When Scanning
Quick Fix:
- Press Volume Up button → Set to maximum
- Turn OFF Do Not Disturb
- Turn OFF Silent Mode
- Test with a notification
Still no sound?
- Restart the app
- Restart your device
- Check Settings → Sound → App Volume
🌐 Problem: Internet Not Working
Quick Fix:
- Test YouTube → Does video play?
- Test Browser → Does Google load?
- Check Wi-Fi/Mobile Data is ON
- Restart device
Still not working?
- Forget Wi-Fi and reconnect
- Turn Mobile Data OFF and ON
- Check if other apps can use internet
- Contact IT support if on corporate network
📷 Problem: Camera Won't Open
Quick Fix:
- Grant camera permission (see Step 4)
- Close app completely
- Reopen app
- Try scanner again
Still not working?
- Check if camera works in other apps
- Restart device
- Check for app updates
🔄 Problem: Badges Not Syncing
Quick Fix:
- Check internet connection
- Look for sync icon (should be rotating)
- Wait for sync to complete
- Manually tap sync button
Still not syncing?
- Check internet speed (may be too slow)
- Restart app
- Check device storage space
- Try syncing one badge at a time
💥 Problem: App Crashes or Freezes
Quick Fix:
- Close all other apps
- Restart the app
- Restart device
Still crashing?
- Check device storage (need at least 1 GB free)
- Clear app cache (Android: Settings → Apps → App → Storage → Clear Cache)
- Update the app if available
- Reinstall app (last resort)
🔐 Problem: Can't Login
Quick Fix:
- Check internet connection
- Verify username and password are correct
- Make sure username has no spaces
- Try again
Still can't login?
- Check if credentials work on another device
- Contact administrator for account reset
- Clear app data and try again (last resort)
📊 Problem: Statistics Not Updating
Quick Fix:
- Restart the app
- Check if scans are being saved
- Verify sync is working
Still not updating?
- Check if badges are actually being scanned
- Verify you're looking at the correct space
- Contact support if issue persists
🆘 Need Help?
Before contacting support, try:
- ✅ Review this guide again
- ✅ Check Troubleshooting section above
When contacting support, provide:
- 📱 Device model (e.g., TC 26, TC 27)
- 📲 Operating system version
- ❌ What problem you're experiencing
- ✅ What you've already tried
📝 Summary
Setup Steps (5-10 minutes):
- ⏱️ Screen timeout → Maximum
- 🔊 Volume → Maximum + DND OFF
- 🌐 Internet → Test with YouTube/Browser
- 📷 Camera → Grant permission
- 🌍 Timezone → Set to the event country's timezone
- ✅ Test → Login and scan
Using the App:
- 🔐 Login → Enter username and password
- 🏢 Select Space → Choose your working area
- 📸 Scan Badges → Use camera or laser scanner
- 🔄 Monitor Sync → Watch for sync completion
- 📊 Check Stats → View today's scans and totals
- 📤 Export Data → Tap the email icon to send reports to organizer
Time Required: 5-10 minutes setup + 10 minutes learning
Result: Smooth, uninterrupted badge scanning!
Document Version: 1.0
Last Updated: 24-11-2025
💡 Remember: Taking 5-10 minutes to set up properly saves hours of troubleshooting during events!